By Claire Whitaker
Updated November 2026
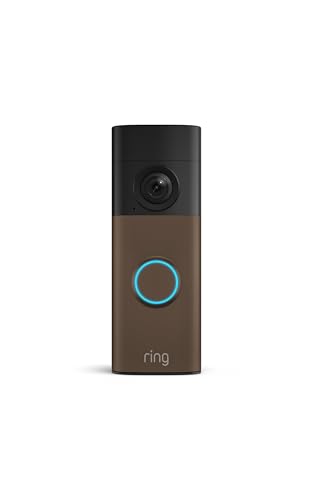
A ring video doorbell solar panel keeps a battery-powered Ring doorbell charged using sunlight, so you don’t have to pull the battery out every few weeks. In this guide you’ll learn how to confirm your doorbell is compatible, choose a panel that fits your sun exposure, mount it correctly, and check that it’s charging. The steps apply to most battery-powered Ring models that accept an external solar input.
What a Ring Solar Panel Does and Who Needs One
A solar panel for a Ring video doorbell is a small photovoltaic panel mounted outdoors and wired to the doorbell through a cable. It converts daylight into a trickle charge that tops up the internal battery. It does not replace the battery, and it won’t power the doorbell in a dark garage or under heavy tree cover. It works best where the doorbell sees several hours of direct or strong indirect sun each day.
Shopping for one? See our guide: Installing Ring Video Doorbell: 3 Best Models Compared (2026).
A solar setup makes the most sense if you have a battery-powered model, your front entrance gets reliable sun, and you want fewer battery swaps. If your doorbell is wired to existing doorbell circuitry, you don’t need a solar panel at all. For a broader look at the trade-offs, see Wired vs Battery Video Doorbells (and Cameras).
Step 1: Confirm Compatibility Before You Buy
Not every Ring model is designed for solar charging. Check the manufacturer’s compatibility list for your exact model number, which is printed on the back of the doorbell or in the Ring app under device settings. Many owners confuse a solar panel with a charging cable, so confirm you’re buying the right accessory type. If you’re unsure which battery or power accessories your model supports, read Ring Video Doorbell Charging Cable: 7 Best Replacements (2026) for background on how Ring handles charging inputs.
Also confirm that the solar panel connects with the cable length you need. Manufacturers specify maximum cable lengths, and running a cable farther than specified can cause voltage drop and slow charging.
Step 2: Size the Panel for Your Sun Exposure
Sizing matters more than most buyers expect. A panel that is too small will barely keep up with motion events and nightly standby drain, while an oversized panel adds bulk without much benefit. Use these factors to decide:
- Sun hours per day: Estimate how many hours of usable sun reach the panel in winter, which is the hardest season. Four or more hours of direct sun is a comfortable target in most climates.
- Shading: A single tree branch or the porch roof overhang can cut output dramatically. Observe the spot at different times of day before you mount.
- Orientation: In the Northern Hemisphere, a south-facing panel typically collects the most sun. East or west facing still works but produces less.
- Activity level: A busy entrance with frequent motion alerts uses more energy. Expect to need a stronger charging source than for a quiet side door.
| Sun exposure at the mount | Likely charging result | Action |
|---|---|---|
| Full direct sun most of the day | Steady top-ups, battery stays high | Standard mount is fine |
| Mixed sun and shade | Slow charging, battery may dip in winter | Reposition panel or add a spare battery |
| Mostly shade or north-facing wall | Battery may drain over time | Choose a different mount point or use wired power |
Step 3: Gather Tools and Supplies
Before you start, collect everything you need so you aren’t climbing a ladder twice. Typical tools and supplies include:
- The solar panel, its mounting bracket, and the cable supplied by the manufacturer
- A drill with bits suited to your wall material (masonry, wood or vinyl)
- A level and a pencil for marking holes
- Exterior-rated mounting screws and wall anchors
- A small screwdriver for the doorbell’s rear bracket
- Cable clips or a weatherproof cable channel to route the wire neatly
Step 4: Mount the Solar Panel
Choose the Mounting Location
Pick a spot on a wall, fence post or eave that gets the most unobstructed sun and sits within the cable length. Keep the panel within reach of the doorbell’s wiring path so the cable doesn’t need to stretch. Avoid placing it where children or pets can easily tug on it.
Drill and Secure the Bracket
Hold the bracket level against the surface and mark the screw holes. Drill pilot holes, insert anchors if your wall requires them, then fasten the bracket firmly. Give it a gentle tug to confirm it won’t pull loose. Attach the panel to the bracket according to the manufacturer’s instructions, tightening fasteners without overtightening, which can crack the panel frame.
Route the Cable
Run the cable from the panel to the doorbell, keeping it away from sharp edges and moving parts like gate hinges. Secure it with clips every 12 to 18 inches so it doesn’t sag or flap in wind. Leave a small loop near each end to allow for thermal movement.
Step 5: Connect and Verify Charging
Plug the cable into the doorbell’s charging input, then connect the panel’s other end as directed. Open the Ring app and check the battery indicator. Charging status may take several hours to show a meaningful change, so don’t expect an instant jump. Check again the next morning after a sunny day. If the percentage isn’t rising at all, recheck the cable seating and confirm the panel is receiving direct sun.
Tips for Better Solar Performance
- Clean the panel face every few months with water and a soft cloth. Dust and pollen reduce output noticeably.
- Trim branches that cast shadows during midday, when sun intensity is highest.
- Expect lower charging in winter. Keep an eye on battery levels during the shortest days.
- Keep a spare fully charged battery on hand if your entrance gets little sun. Swapping batteries is quicker than waiting on a slow charge. For battery choices, see Top 5 Batteries for Ring Video Doorbell Options Compared (2026).
Common Mistakes
- Mounting in deep shade. A panel facing a covered porch wall rarely gets enough light. Test sun exposure first.
- Using the wrong cable. Mismatched or damaged cables can prevent charging or stress the doorbell’s port.
- Ignoring cable length limits. Stretching the cable too far causes slow charging.
- Overtightening the mount. This can crack the panel housing or strip anchor holes.
- Assuming the panel replaces the battery. Solar supplements the battery; it doesn’t eliminate maintenance entirely.
Recommended gear
A few accessories help the install go smoothly and keep the setup durable:
- Exterior mounting screw and anchor kit: Masonry or vinyl anchors sized for your wall prevent the bracket from loosening over time. View on Amazon
- Weatherproof cable clips: Hold the wire securely without pinching it, reducing the risk of abrasion. View on Amazon
- Cordless drill with masonry bits: Makes clean pilot holes in brick or stucco. View on Amazon
FAQ
Does a ring video doorbell solar panel charge the battery fully?
It can, given enough direct sun, but results vary by season and location. Many owners find the battery holds steady in summer and dips slightly in winter.
Can I use a solar panel with any Ring doorbell?
No. Only certain battery-powered models accept external solar input. Check the manufacturer’s compatibility list for your exact model.
How long does it take for the battery to charge?
Charging is gradual. Expect several hours of good sun before you see a meaningful change in the app, and a full recharge may take a day or more depending on the starting level.
Will rain or clouds stop charging?
Clouds reduce output but rarely stop it entirely. Heavy overcast or rain will slow charging, so a spare battery is useful during long gray spells.
Can the solar panel be placed far from the doorbell?
Only within the cable length the manufacturer specifies. Going beyond that limit can cause voltage drop and reduced charging.
Does the panel work in the shade of a porch?
Usually not well. Shaded panels produce little power, so mount the panel in a sunnier spot if possible.
Do I need to clean the solar panel?
Yes, periodically. Dust, pollen and bird droppings reduce output, so a quick wipe every few months helps maintain charging.
Should I consult a professional for installation?
If your wall is brick, stucco or otherwise hard to drill, or if you’re unsure about routing the cable, a qualified installer can help. Always follow the manufacturer’s safety guidance.
Conclusion
A ring video doorbell solar panel can cut down on battery swaps when your entrance gets reliable sun. Confirm compatibility, size the panel to your exposure, mount it securely, and verify charging in the app. Keep the panel clean and plan for winter dips with a spare battery, and your doorbell should stay powered with far less effort.
Related reading
Ready to choose one?
About Claire Whitaker
Claire Whitaker is part of our editorial team and reviews and edits our smart home guides, checking product details against manufacturer specifications and owner feedback.